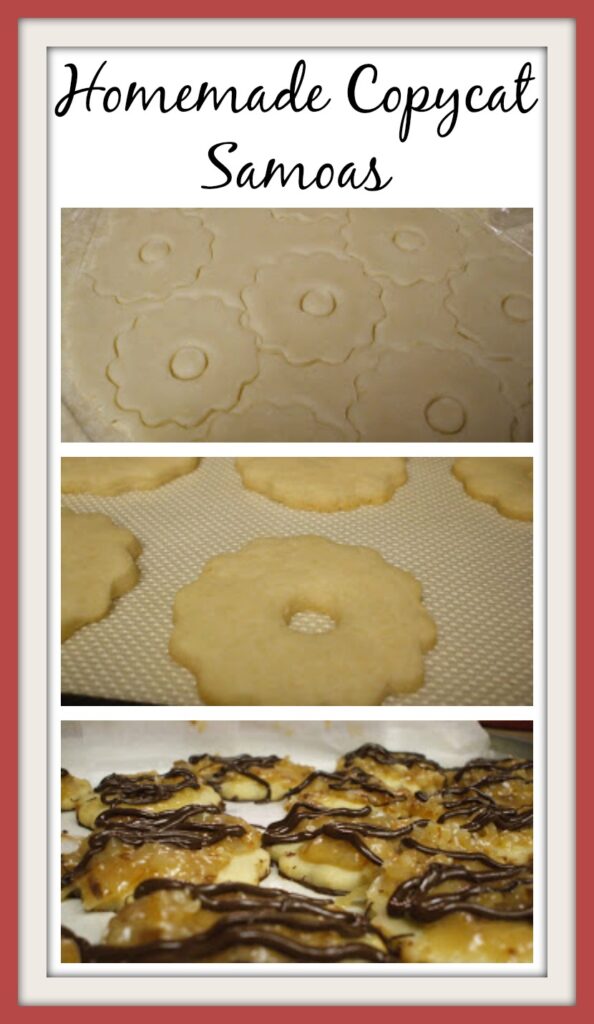
As promised, here is another homemade version of a favorite Girl Scout cookie: the Samoa. This is probably my boys’ favorite GS cookie. It is a shortbread cookie with a layer of chocolate on the bottom and a layer of ooey, gooey coconut and caramel on top.
There are a few different versions of these cookies already on the internet. One ignores the cookie on the bottom and simply cooks caramels and chocolate until they are firm enough to stand on their own. Another involves melting store bought caramels into the coconut topping. I wasn’t satisfied with any of them, so this is my own compilation of recipes.
My verdict: These cookies took a while to make. First you have to bake the cookies, then dip them in chocolate, then make the topping and spread that on, then let them cool, then drizzle the final chocolate on top. However, this recipe makes over 5 dozen for far less than you would pay for that many from the little badge covered ladies outside the grocery store. If you adore these cookies and spend more on them every year than you’d like, they are worth the effort. Oh, and be sure to store them in the fridge or you will have melted chocolate all over the place.
1. Info for Homemade Girl Scout Samoa Cookies
- Cook Time: unavailable
- Total Time: unavailable
- Servings: 60
- Calories: unavailable
2. Ingredients for Homemade Girl Scout Samoa Cookies
- The Cookie:
- 1 pound (2 cups) butter
- 1 cup sugar
- 2 tsp vanilla
- 4 cups flour
- 1 bag chocolate chips
- The Topping:
- 6 Tbsp butter
- 1 tsp vanilla
- 2 cups toasted coconut
3. Directions:
- Cream the butter, sugar and vanilla.
- Add the flour and mix.
- Roll out to ¼ inch thin and cut into shapes (I used a ruffly round cutter and a single flower holder to cut out the center:
- Bake 10-12 minutes at 350 degrees.
- Let cool.
- Melt ⅔ of a bag of chocolate chips and spread chocolate on the bottoms of the cookies.
- Let dry/cool upside down on a pan.
- Boil the butter, sugar and corn syrup.
- Slowly add the condensed milk and stir until mixture reaches 200-210 degrees. Remove from heat and add vanilla and toasted coconut.
- Place coconut in a nonstick pan.
- Turn heat on medium high.
- Stir constantly until edges of the coconut just begin to brown.
- Lower heat and continue to stir until evenly toasted.
- Place the cookies right side up on waxed paper.
- Spoon the coconut mixture over the cookies (I ran out of topping and had 6 cookies left over. They were good with just the chocolate on the bottom – sort of like a Pepperidge Farm Milano cookie).
- Put them in the fridge to harden (about 15 minutes).
- Melt the remaining chocolate chips, spoon the melted chocolate into a small zip lock bag, snip a tiny bit off one bottom corner and squiggle chocolate over the coconut on the cookies.
- Place back in the fridge until firm.

